Jitpack: Create & Publish Android Library
Welcome to Step-by-Step Tutorial for creating and uploading your first Android library

Jitpack: Create & Publish Android Library
Hello folks! if you’ve somehow reached here finding out how to create an Android library, then you are at correct place.
In this tutorial, we’ll go through step-by-step guide how you can create and publish your own Android Library on Maven using the Jitpack.
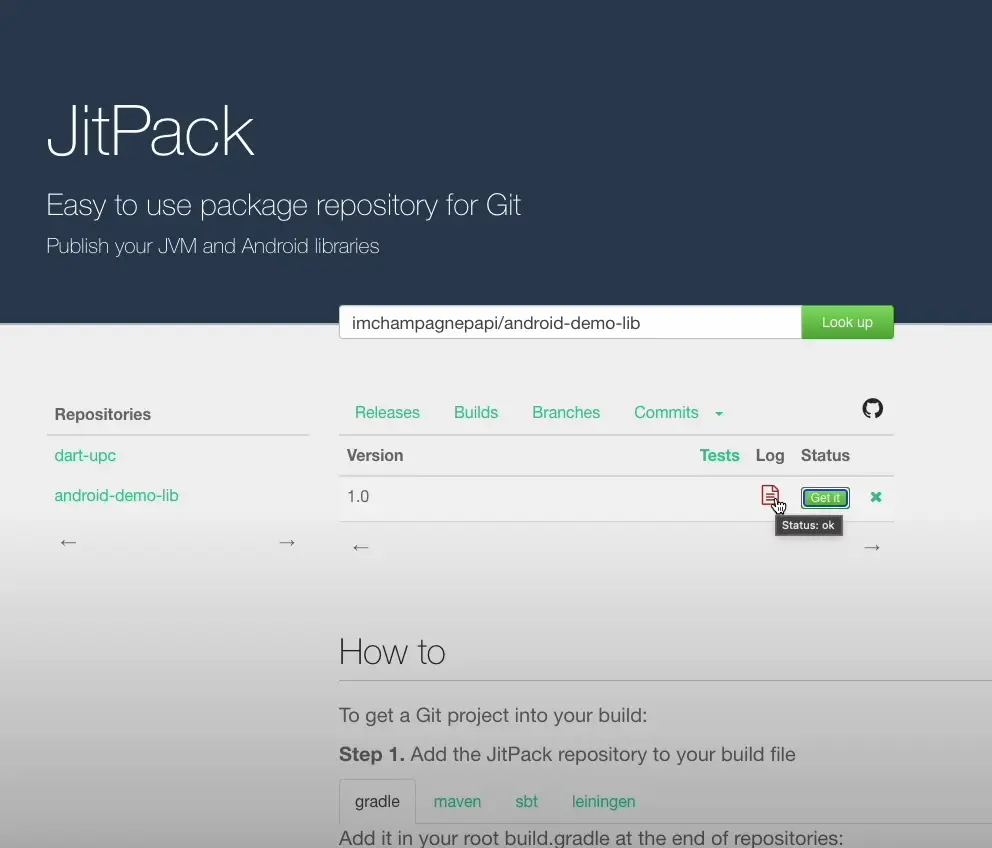
Step 1: Android Project Setup
Create an Android Project in which we will be creating our new Android Module/ Library. I prefer to use Android Studio, you can choose your favourite IDE such as IntelliJ or other similar IDE.
I’m using the Android Studio Flamingo | 2022.2.1
Open Android Studio, just name the project whatever you wish to and then give it package name and select the project language (Java/ Kotlin) and then selecting the minimum SDK and hitting on Finish button will create you an Android project.
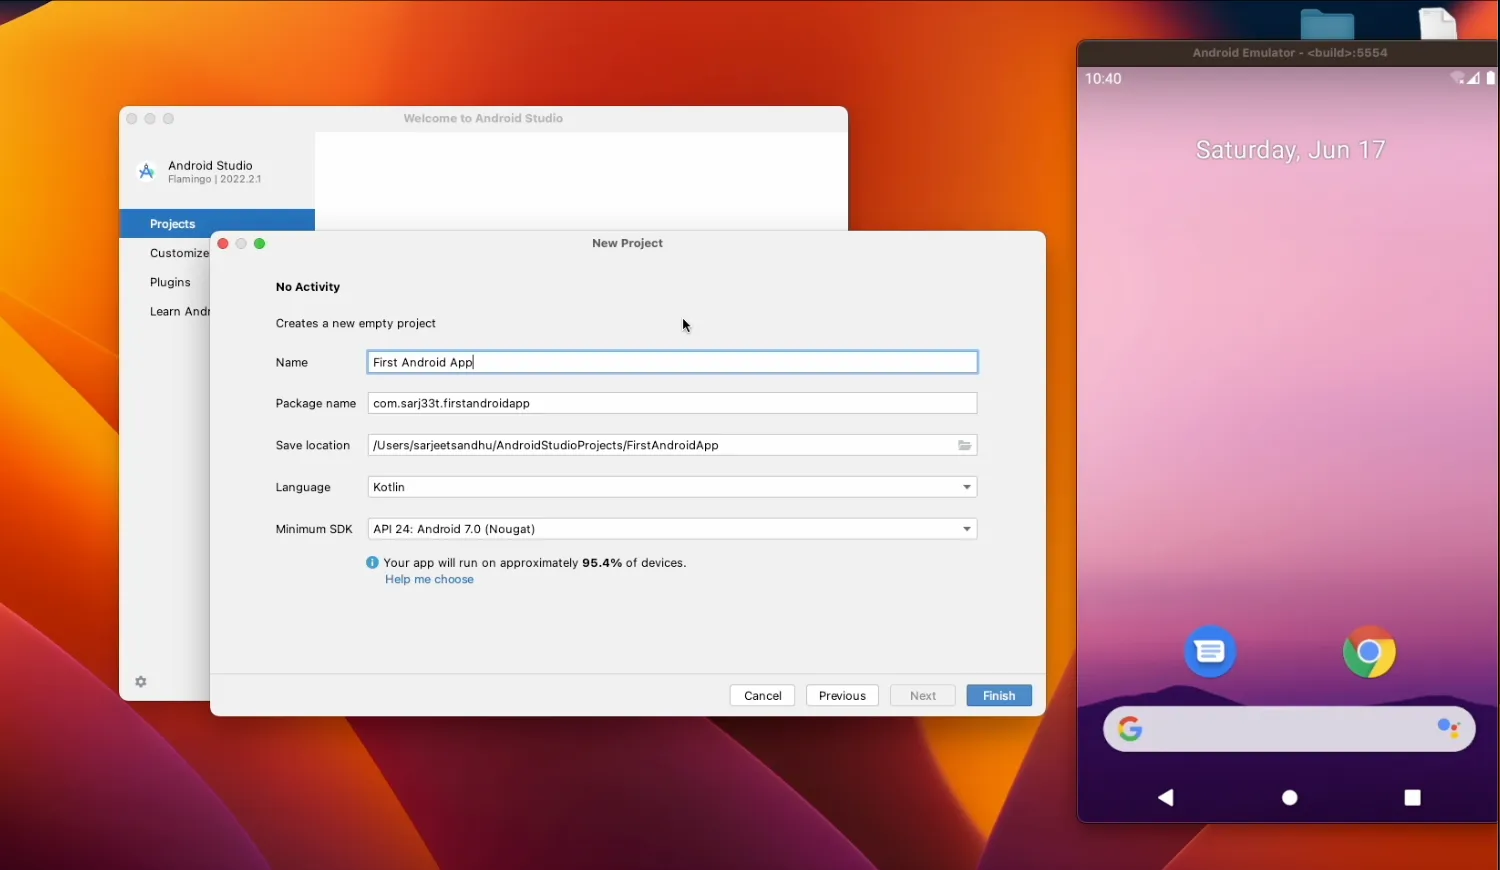
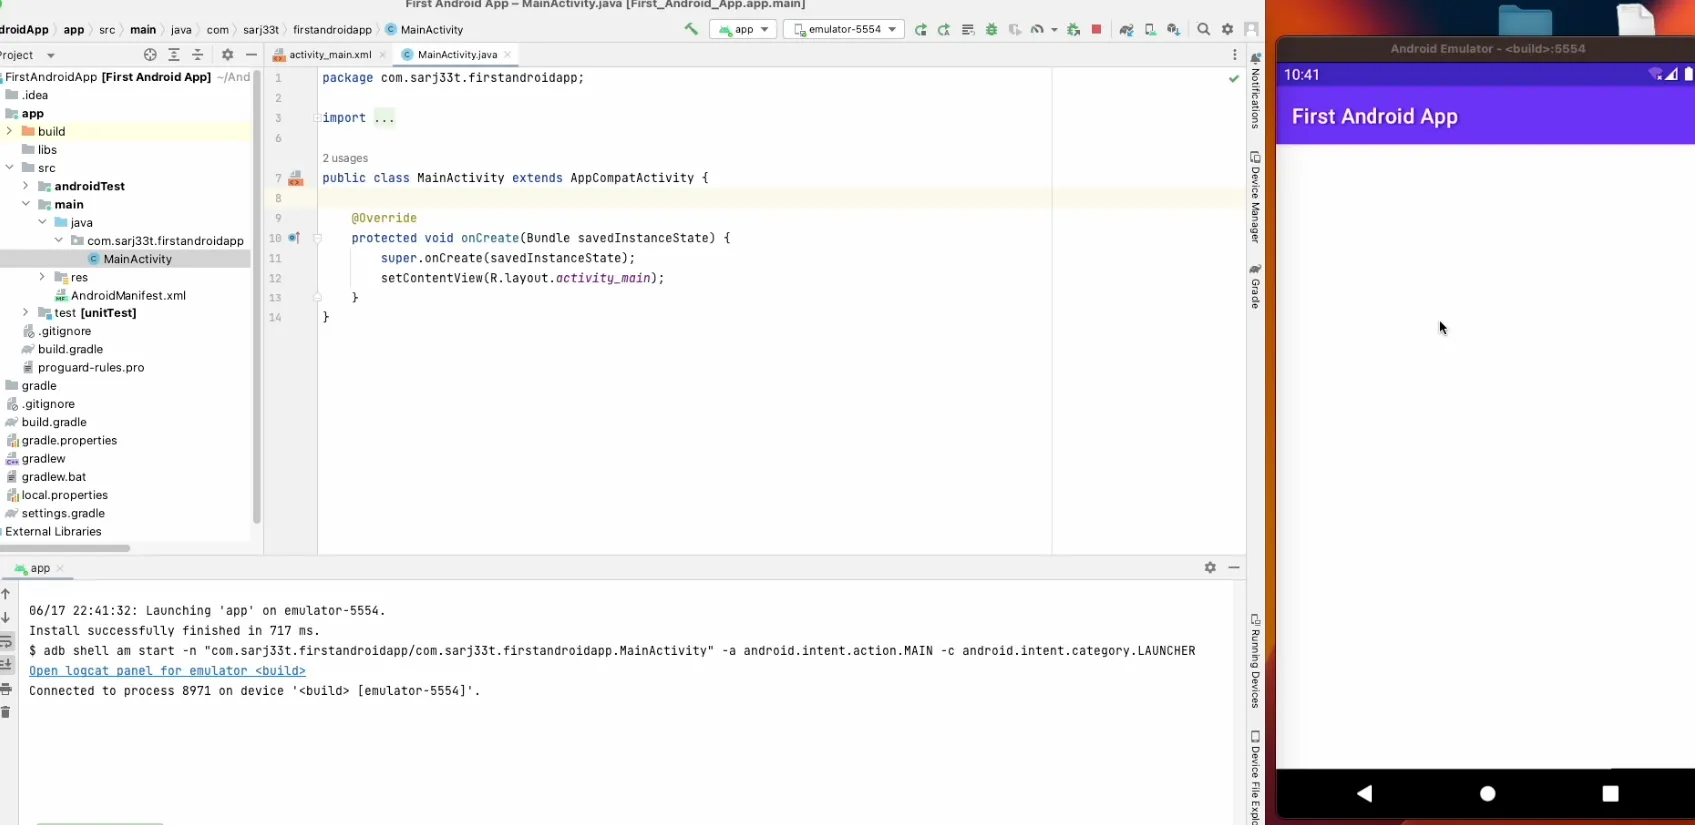
After creating the project in Android Studio, just build & run to check everything works fine so far. As shown in image below our application is successfully running in an emulator. We can now move to next step.
Step 2: Creating & adding New Module to the project
Create an Android Module and add it as dependency to our Android project. Implement some logic to this library. In order to test this library is working, import it in Android project and try to call the defined public methods.
How to — On top left corner of Android Studio, click on File > New > New Module, choose ‘Android Library’ from left sidebar templates to create a new module. Name your module and select the programming language in which you wish to write code (Java/ Kotlin). You can also select the minimum version of SDK you want to set.
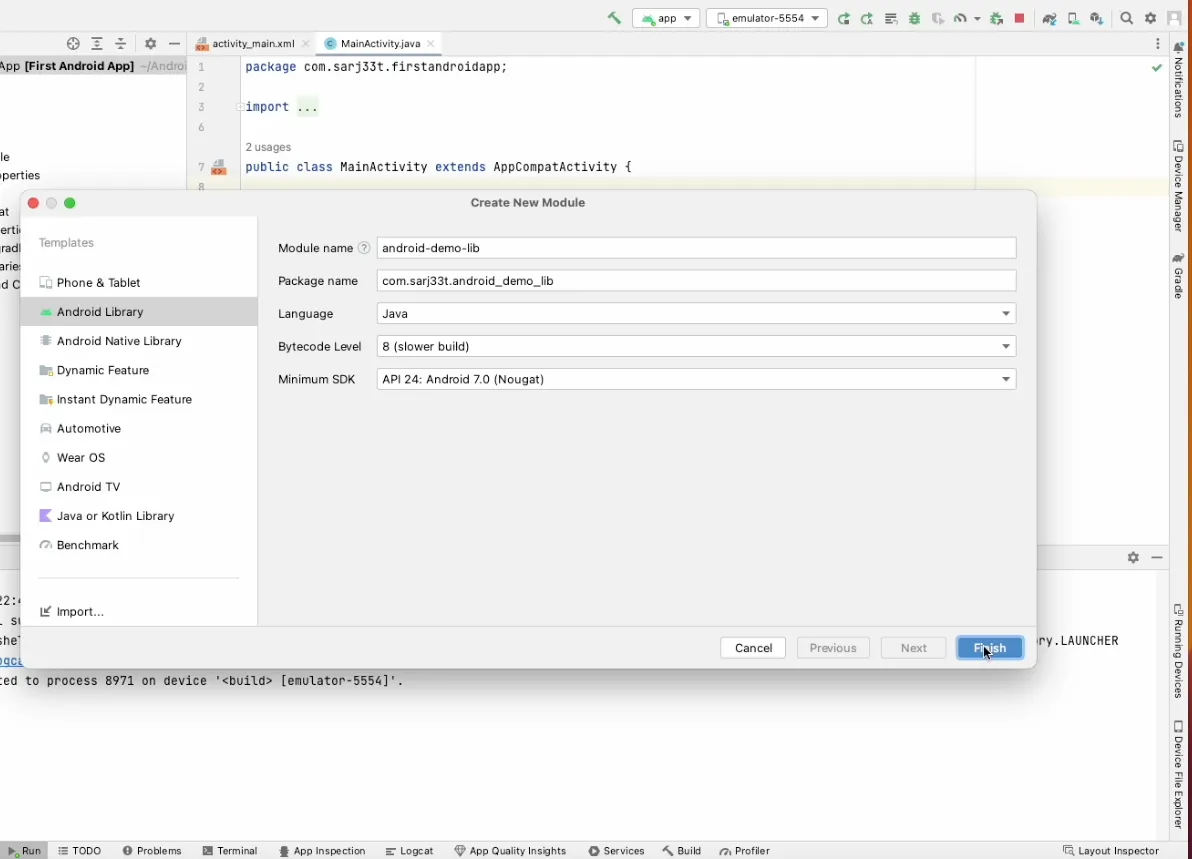
When the library is created, you will see it in your project’s root directory in bold characters. Add whatever logic you want to in the library source code. Here I,m simply using below code for simplicity which will just print the log with the provided tag and message in the Logcat:
package com.sarj33t.android_demo_lib;

import android.util.Log;

public class HelloWorld {
    public static void main(String[] args){
        /// Main Method
    }

    /// Prints Message with Tag in Logcat
    public static void printLog(String tag, String message){
        Log.d(tag, message);
    }
}
Next, we’ll be adding this library as a dependency module for our project so that we can import it and use this library. See below image for reference:
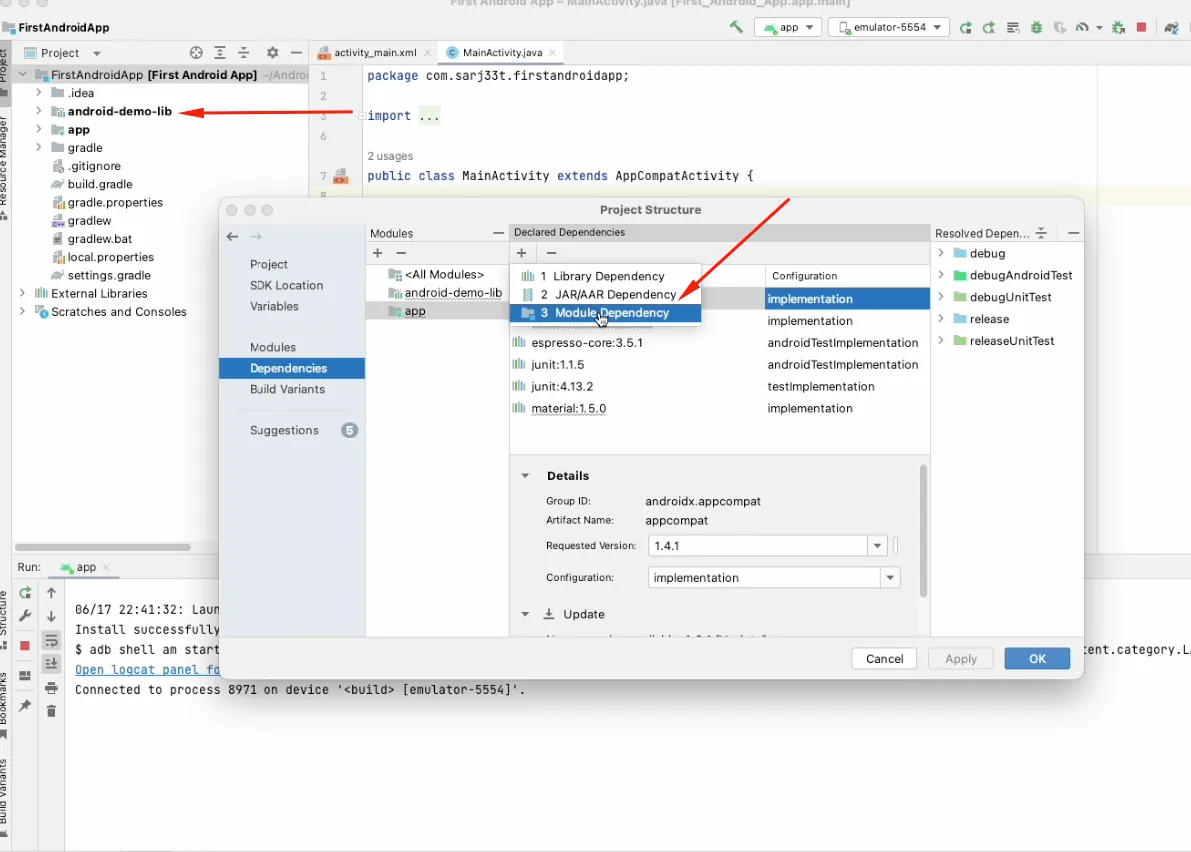
How to — In Android Studio, click on top-left corner File and select Project Structure, a dialog will pop-up, select Dependencies from left sidebar of the dialog and then click on app under Modules section and then under the Declared Dependencies, click “+” icon to select Module Dependency. An another dialog will appear in which you will have to select the module and then click OK.
Step 3: GitHub Integration & Jitpack Setup
Create GitHub repository to upload our project source code. Open https://jitpack.io and login into it using the same Git Account on which we created the repository.
Next, we will be creating one GitHub repository where we will be uploading our Android project and also build our release on GitHub.
Initialize the Git in the project’s root directory and commit all the files to this repository.
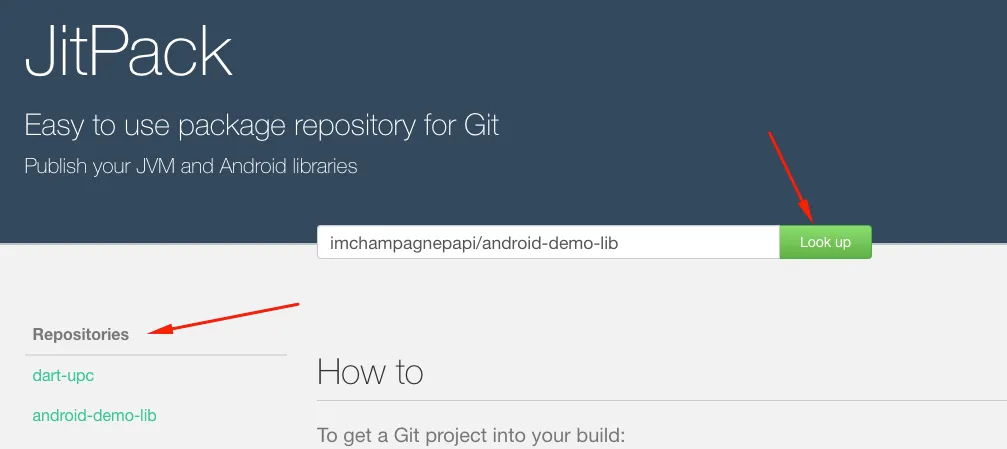
After uploading our project to Git repository, we will navigate to https://jitpack.io and login into it using the Git account on which we have created the repository and committed our project source code.
Once we logged it, Jitpack will start showing up all the public Git repos on its dashboard.
Refer below screenshot:
Step 4: Generate .aar file, adding jitpack and pom files
Build our library & create an AAR file which we would be publishing to Maven Repo. Configure Jitpack.yml & POM.xml files. Commit all these files to our Git Repo.
Next step is to build this library and generate the .aar archive file which we will be publishing to the Maven repository. Open terminal in your Android Studio and hit the below command to generate the release build of your library:
./gradlew assembleRelease
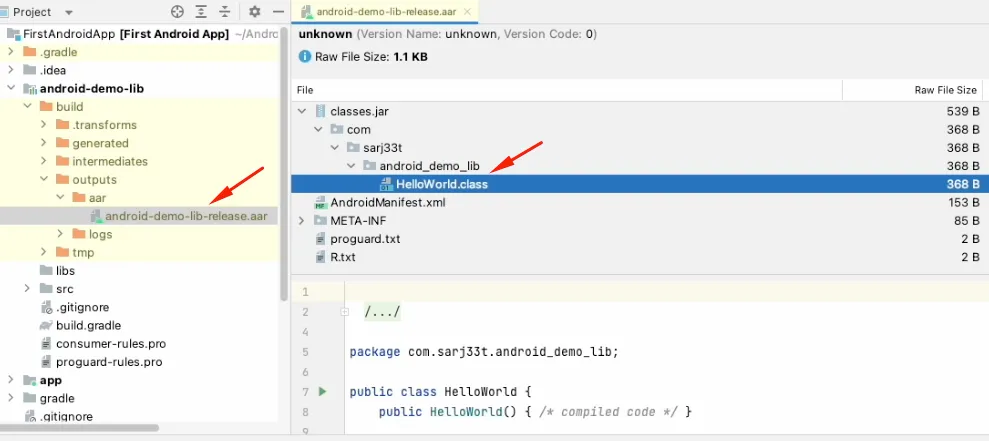
As you can see, the .aar file is generated, and you can also double-click it to explore its source code, you will find the compiled java classes inside classes.jar along with other files such as AndroidManifest. Copy this .aar file to project’s root directory.
Now, we will add 2 more files — jitpack.yml & POM.xml in our project’s root directory.
jitpack.yml
# configuration file for building snapshots and releases with jitpack.io
jdk:
  - openjdk17
before_install:
  - ./scripts/prepareJitpackEnvironment.sh
install:
  - FILE="-Dfile=android-demo-lib-release.aar"
  - mvn install:install-file $FILE -DgroupId=com.github.imchampagnepapi -DartifactId=android-demo-lib -Dversion=1.0 -Dpackaging=aar -DgeneratePom=true
pom.xml
<?xml version="1.0" encoding="UTF-8"?>
<project xsi:schemaLocation="http://maven.apache.org/POM/4.0.0 https://maven.apache.org/xsd/maven-4.0.0.xsd" xmlns="http://maven.apache.org/POM/4.0.0"
         xmlns:xsi="http://www.w3.org/2001/XMLSchema-instance">
    <modelVersion>4.0.0</modelVersion>
    <groupId>com.github.imchampagnepapi</groupId>
    <artifactId>android-demo-lib</artifactId>
    <version>1.0</version>
    <packaging>pom</packaging>
    <description>First Android Library</description>
</project>
Commit all these files to our Git repository.
Step 5: Locally publish to maven
Before publishing to Maven Repo directly, lets first try to publish the library to localMaven using the gradle command:
./gradlew publishMavenPublicationToMavenLocal
Step 6: Create & publish a new release on the GitHub using the AAR File
We’ll now create and publish a new release on the GitHub using the .aar file we have committed earlier. After creating this release, go back to Jitpack dashboard, check for the latest releases. Jitpack will automatically starts building the library, once done successfully you’ll see the Log icon in green on Jitpack. You can also check this Log dumped by Jitpack while building and publishing our library.
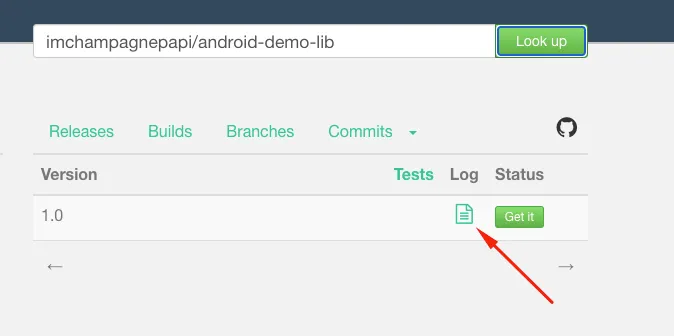
If the library is successfully build, you’ll find this at the end of Log file as shown below:

Step 7: Using our library in any Android Project
Create a separate Android Project and use the newly published library as Maven Dependency in app’s build.gradle using the implementation syntax. Exploring source code of our library and importing & using it in our project.
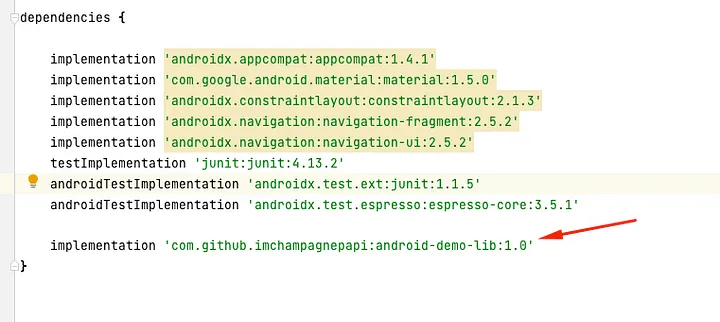
As you can see, I’m using this newly created library in my other Android project. And that’s all for today. Thanks for reading, much appreciated ❤