Guide to Install VMWare Fusion on Mac
Install & Run Windows 11 ARM on Mac Apple Silicon Using VMWare Fusion 13

VMware Fusion: Overview and Purpose
VMware Fusion is a virtualization software for macOS that allows users to run multiple operating systems (like Windows, Linux, or other versions of macOS) simultaneously on a Mac computer without rebooting. It creates virtual machines (VMs), which are isolated environments that mimic the behavior of a physical computer.
Why Do We Need VMware Fusion?
Hello folks! In this tutorial, we will walk you through how to install and run Windows 11 ARM on a Mac with Apple Silicon using VMWare Fusion 13, completely FREE. Let’s dive into this step-by-step guide.
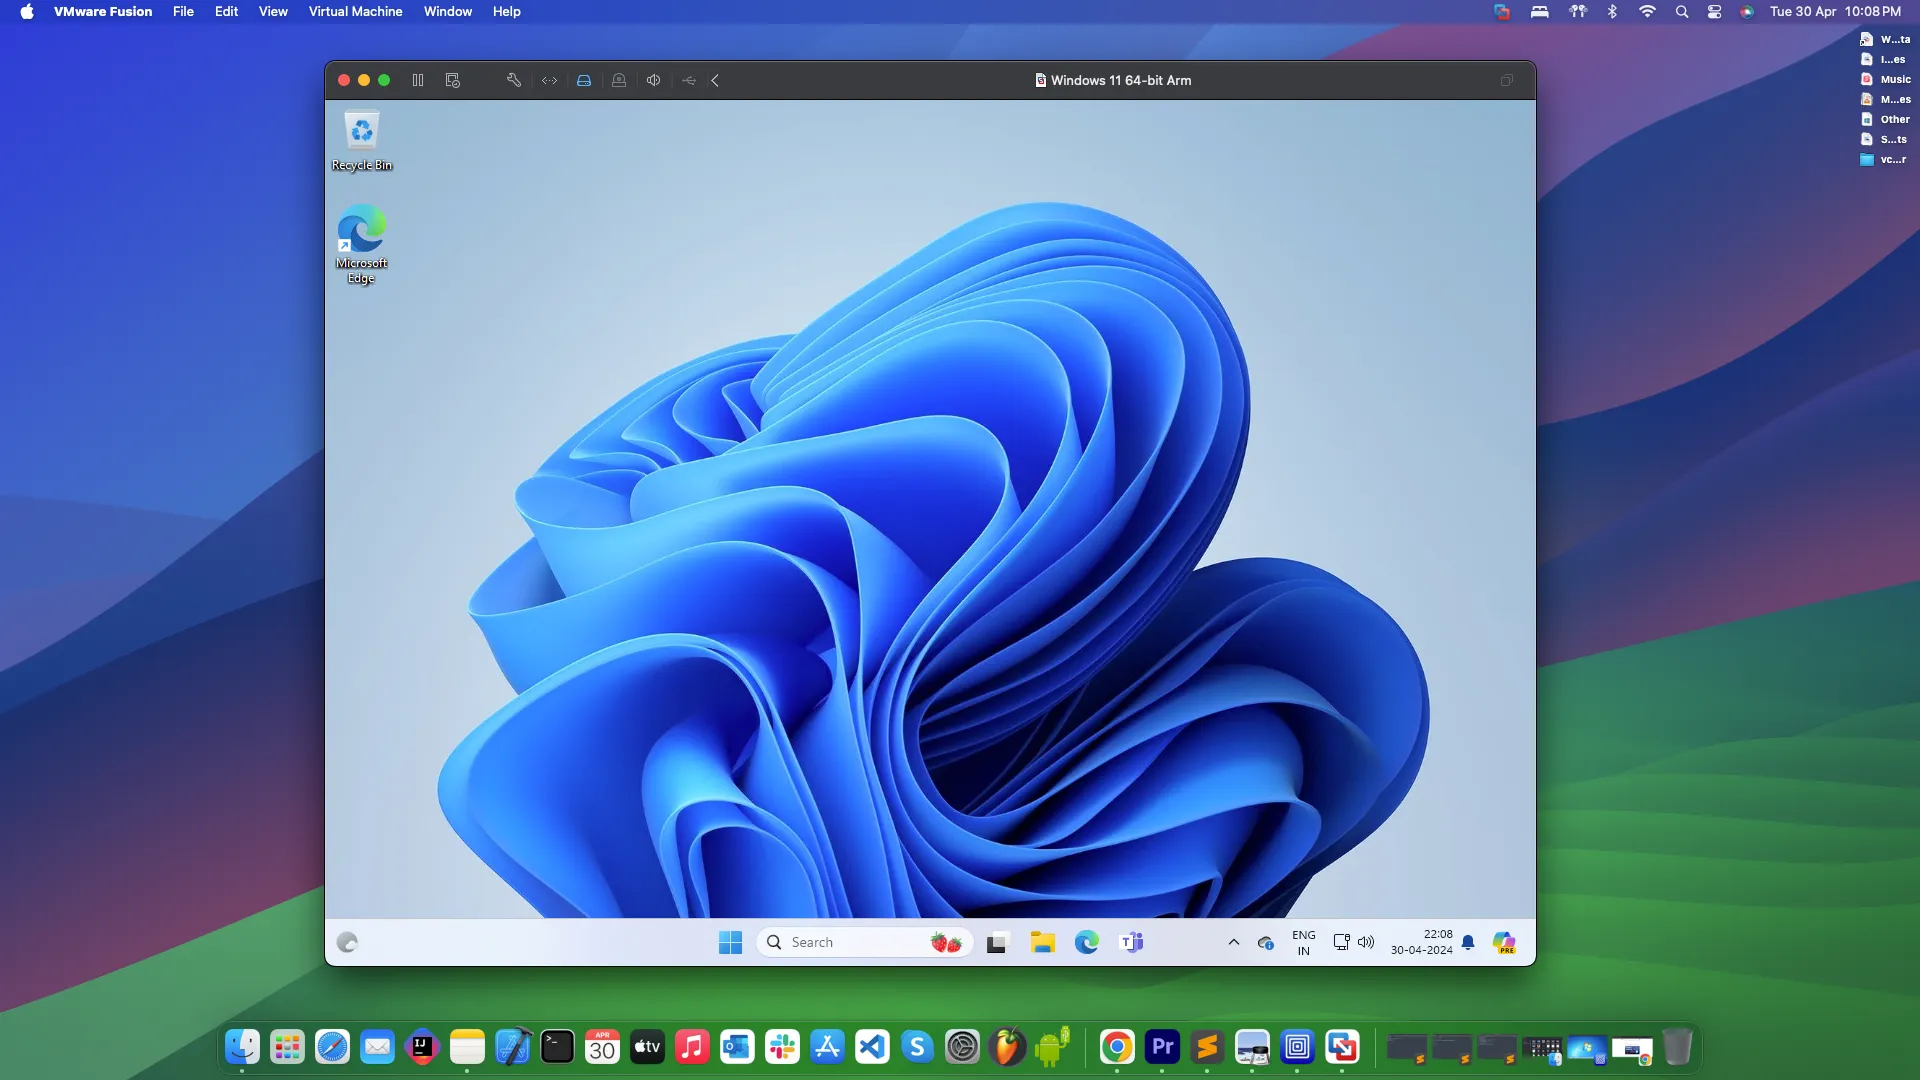
Step 1: Download & Install VMWare Fusion
The first step is to download and install VMWare Fusion on your Mac machine with Apple Silicon. Visit the official VMWare website to download the latest version of VMWare Fusion:
Once downloaded, double-click on the DMG file to open it, and follow the on-screen instructions to install VMWare Fusion. When prompted for a license key, move on to Step 2 for obtaining a FREE license (personal and non-commercial use only).
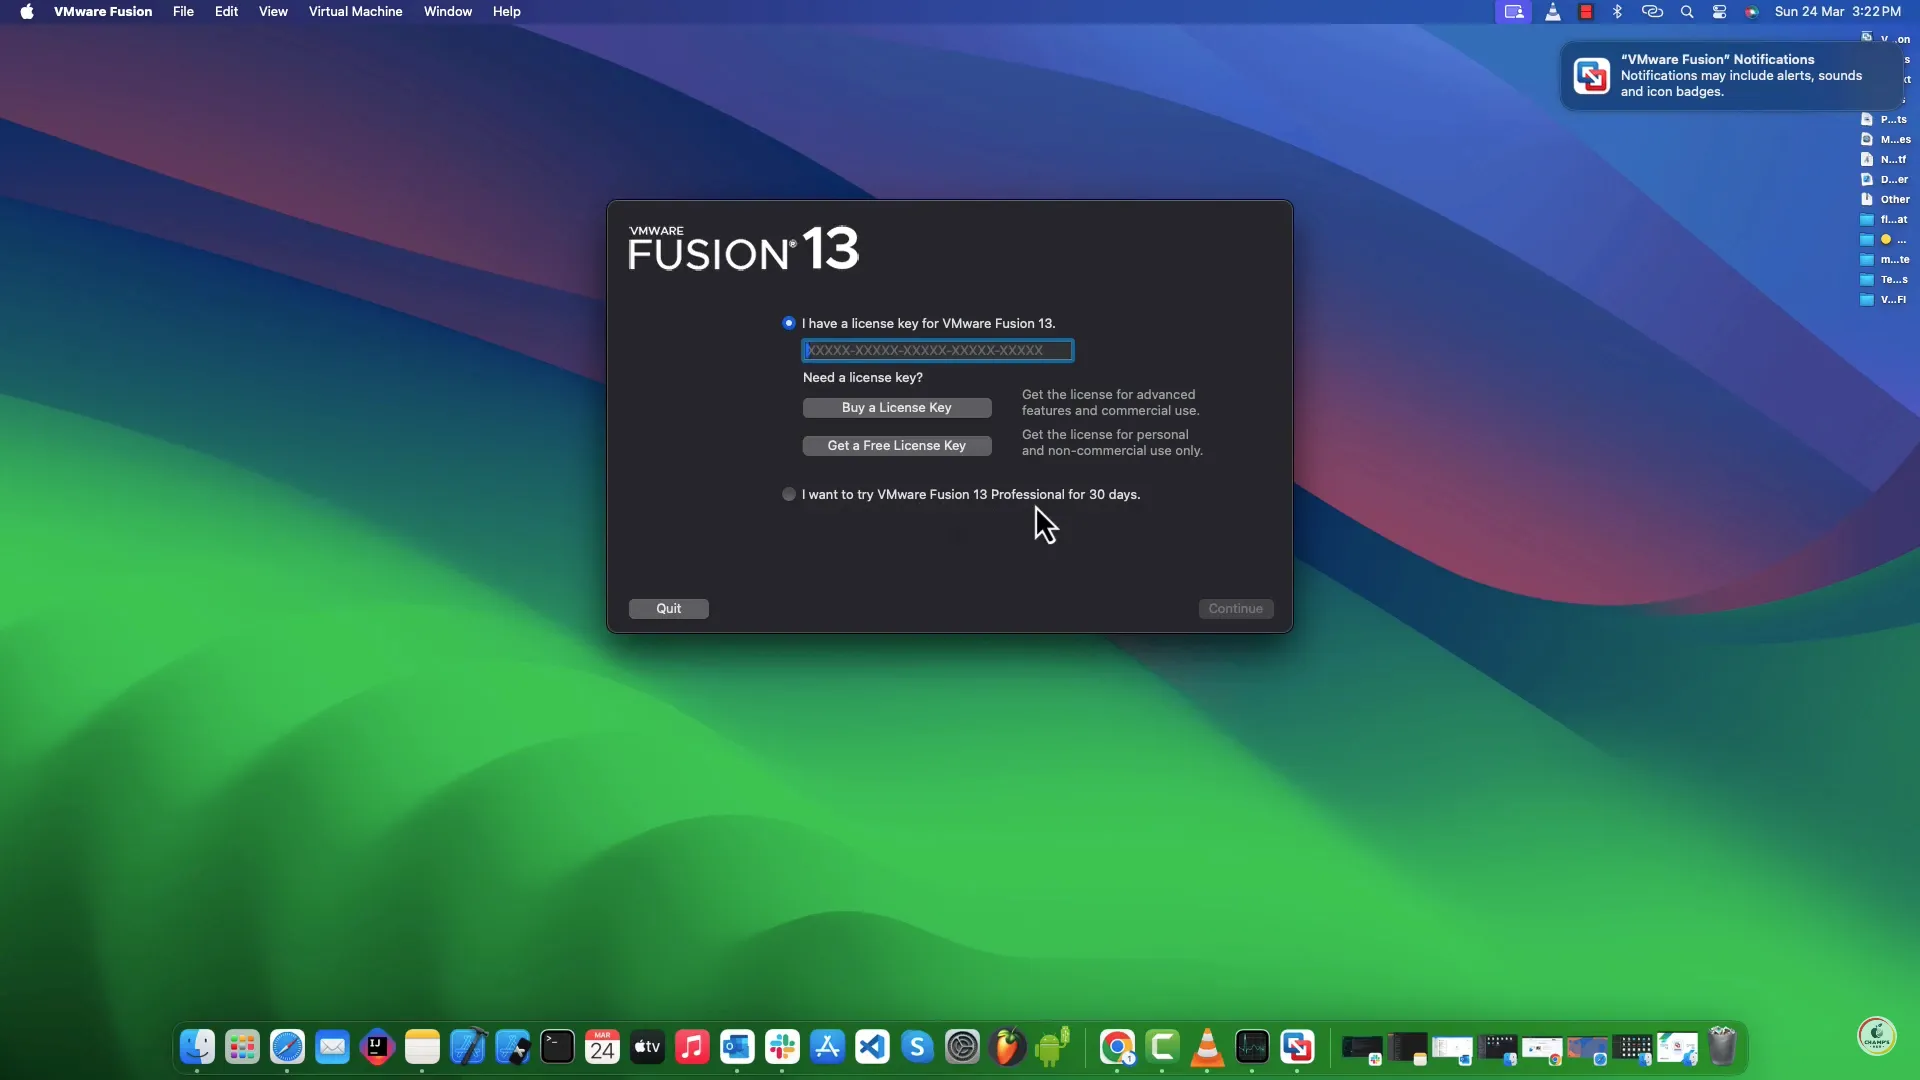
While installing, it will ask you for a license key as shown in image above, proceed to Step 2 for obtaining FREE license (personal & non-commercial usage only).
Step 2: Obtain a Free License Key for Personal Use
To obtain a free license key for personal usage, click on “Get a Free License Key” in the installation window. After the page loads, scroll down to the License & Download section as shown in the image below:
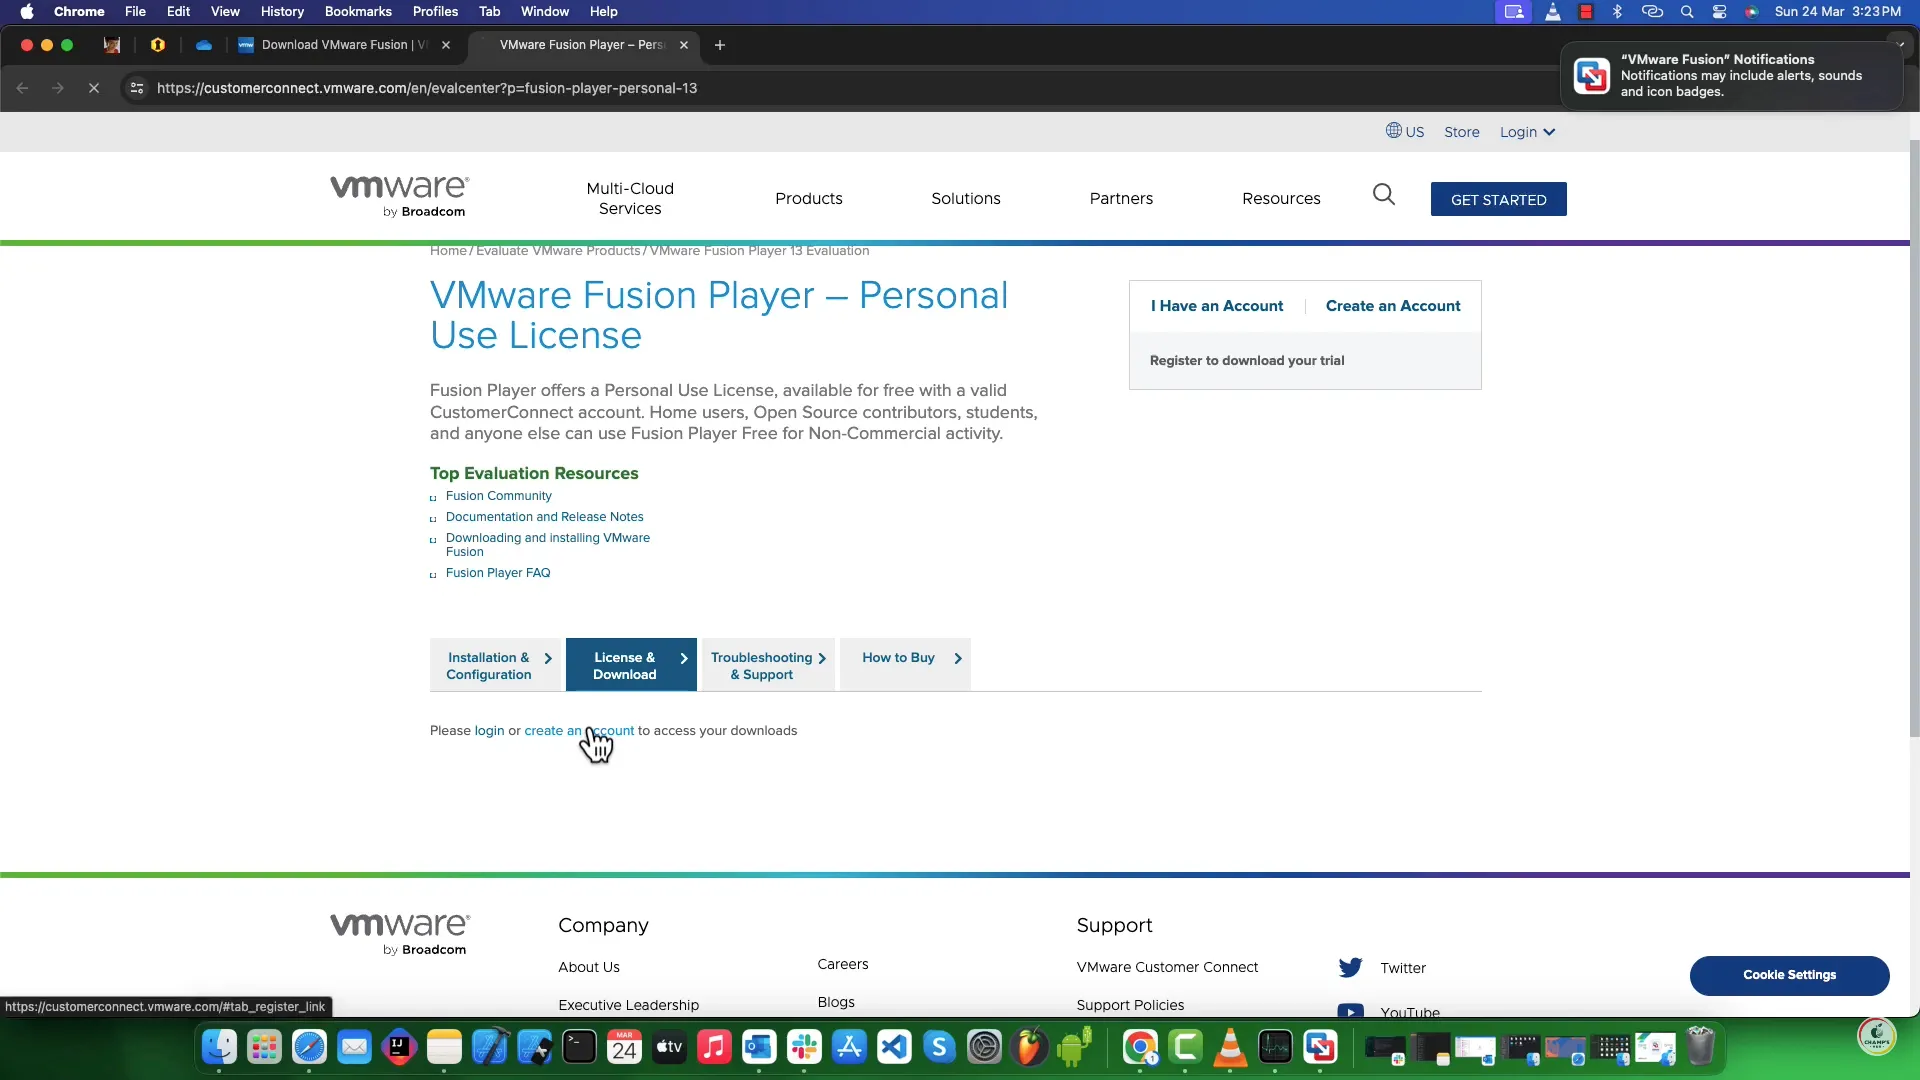
Register for an account using this link: Create an Account.
After registration, log in, and go to the License & Download section to find your personal license key as shown in image below:
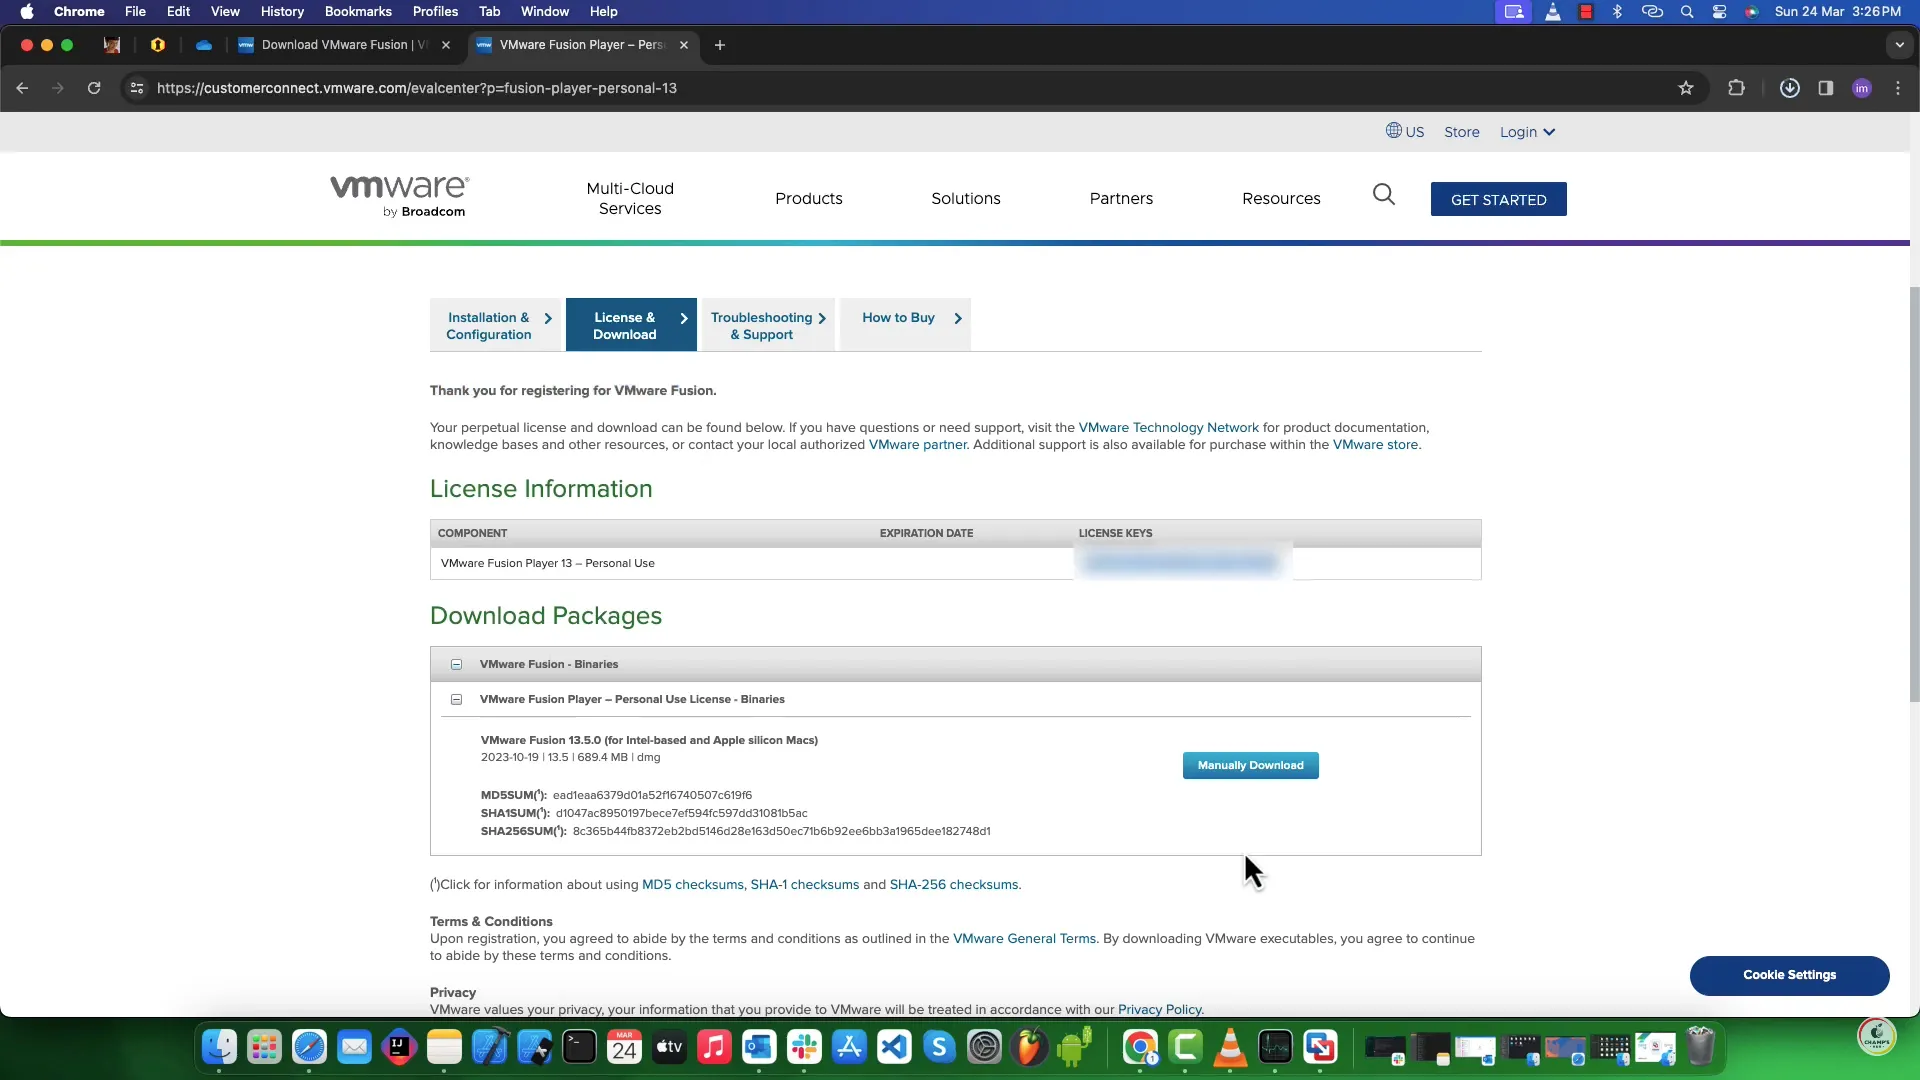
Copy this license key and paste it into the installation window and complete the installation process.
Step 3: Download Windows 11 ARM ISO from Microsoft
Once VMWare Fusion is installed, open it and click “Get Windows from Microsoft.” Follow the steps to download the Windows 11 ARM ISO image:
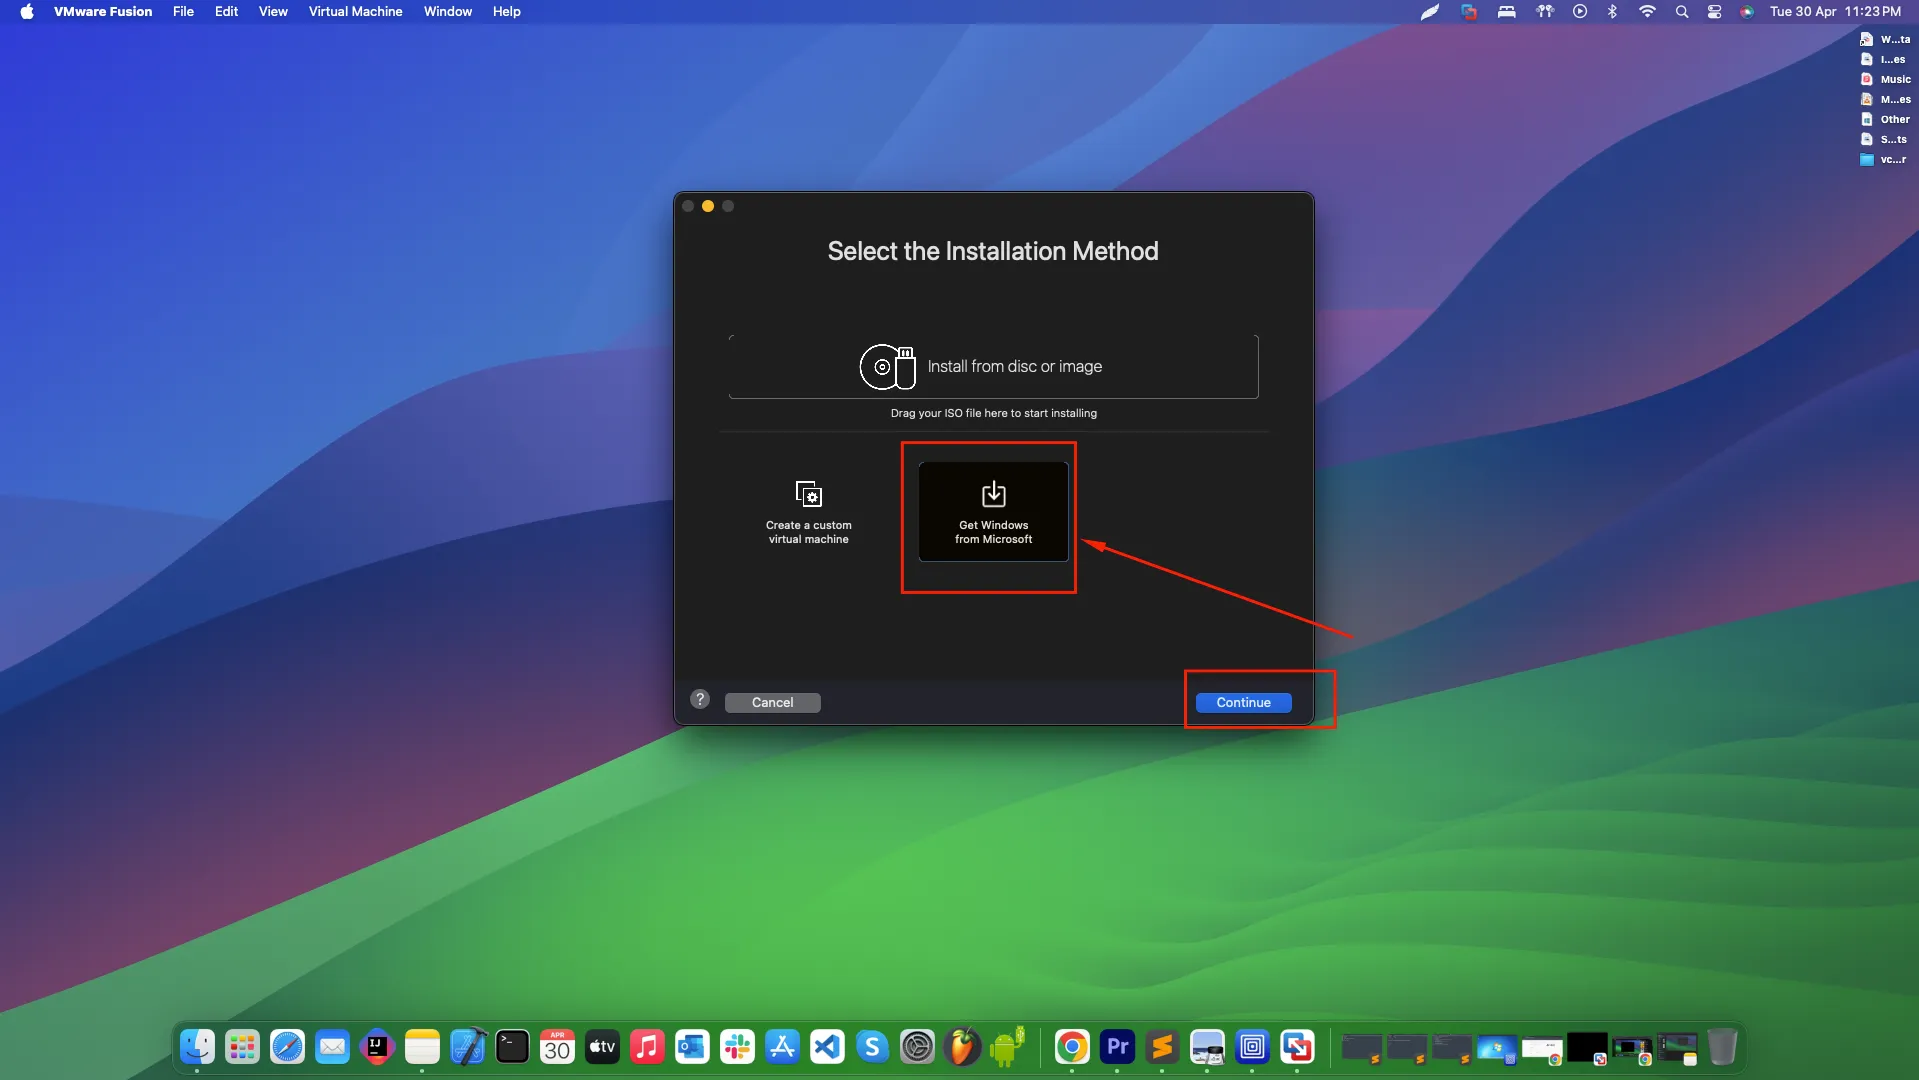
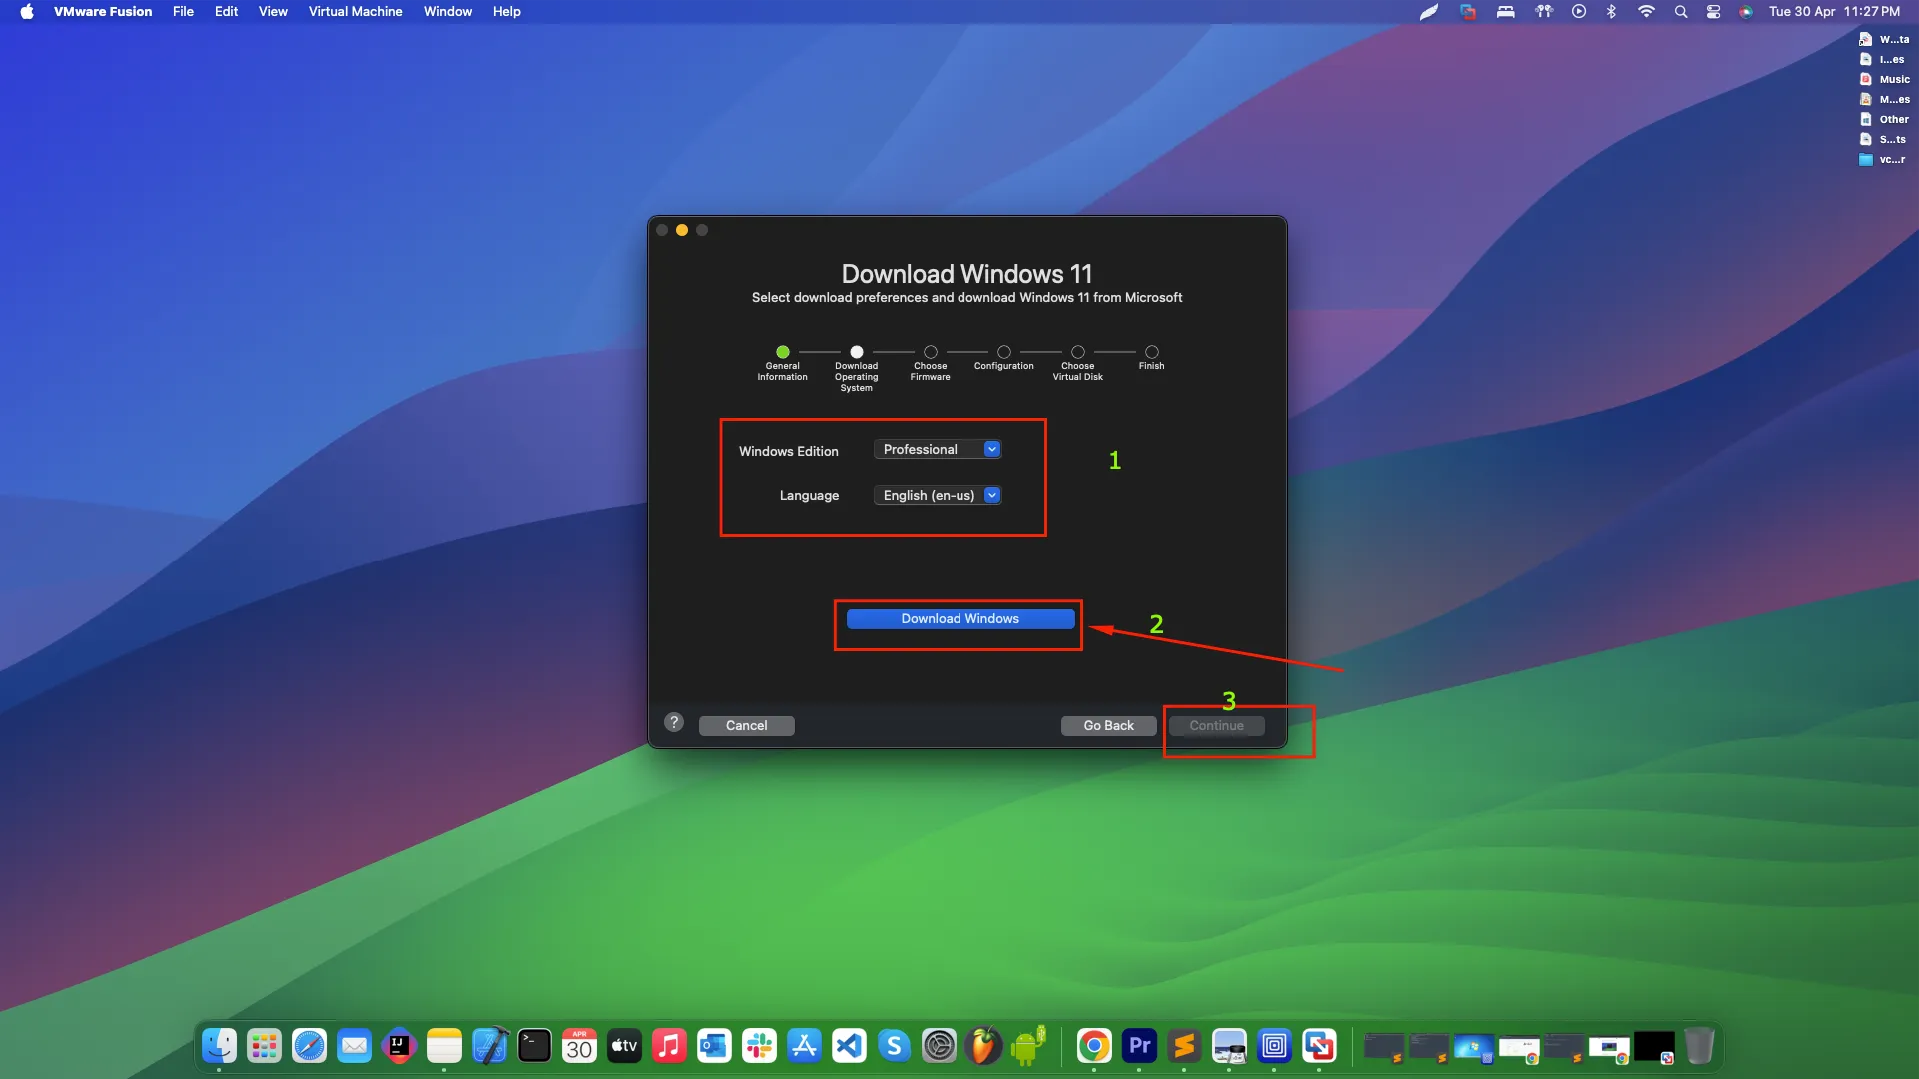
By selecting the correct Windows11 ARM edition and language, click on Download Windows. This will start downloading the Windows ISO image directly from the Microsoft official sources.
Once download is finished it will then ask for some configurations such as Firmware type, set it to **UEFI** boot. Next it will ask for encryption, keep the default options checked and simply fill up the password fields and hit continue. See the below attached screenshot:
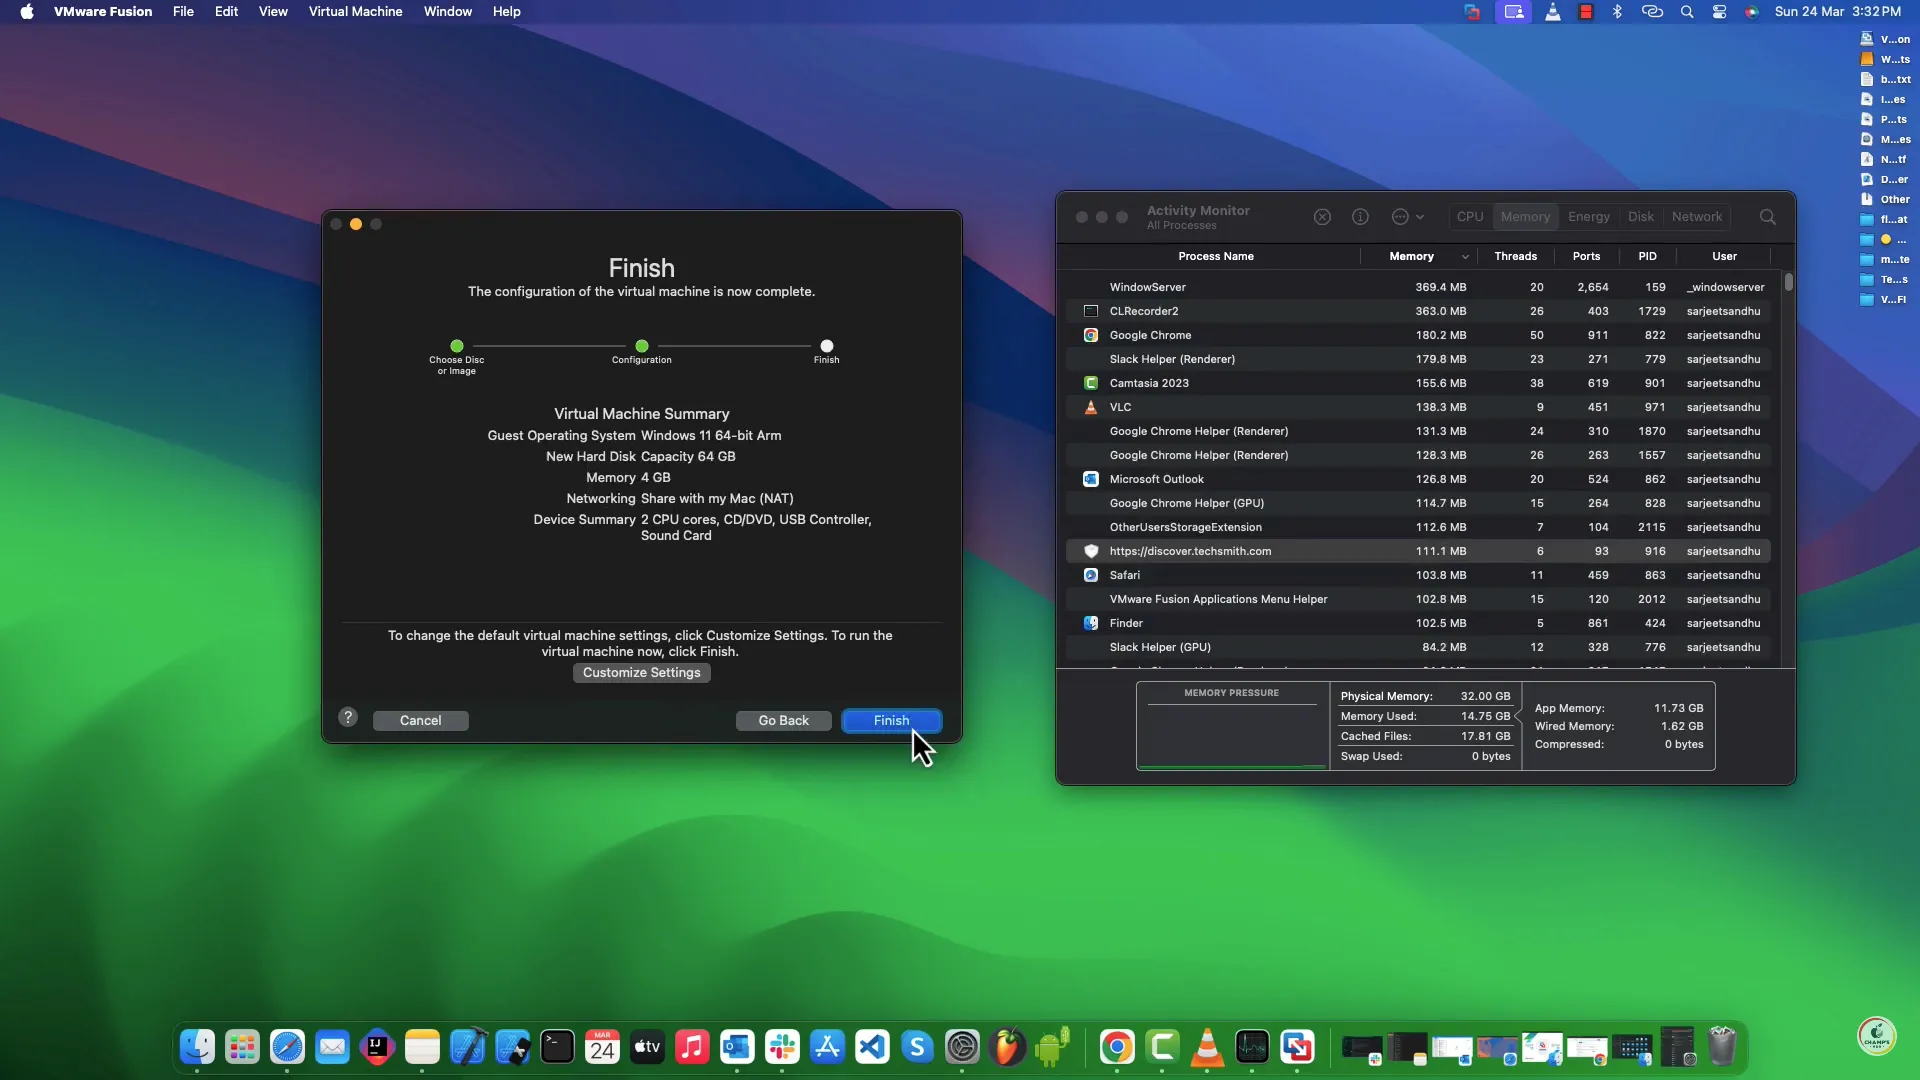
Once done, click finish. Now Click on Play button and it will start booting Windows11 installer. Follow the onscreen instructions to begin with the Setup and Installation process of Windows11.
Step 4: Install VMWare Tools Using CMD Prompt
Meanwhile, installing Windows11 ARM, you might encounter the below-mentioned screenshot error where Windows couldn’t detect the internet connectivity. Do not worry about this.
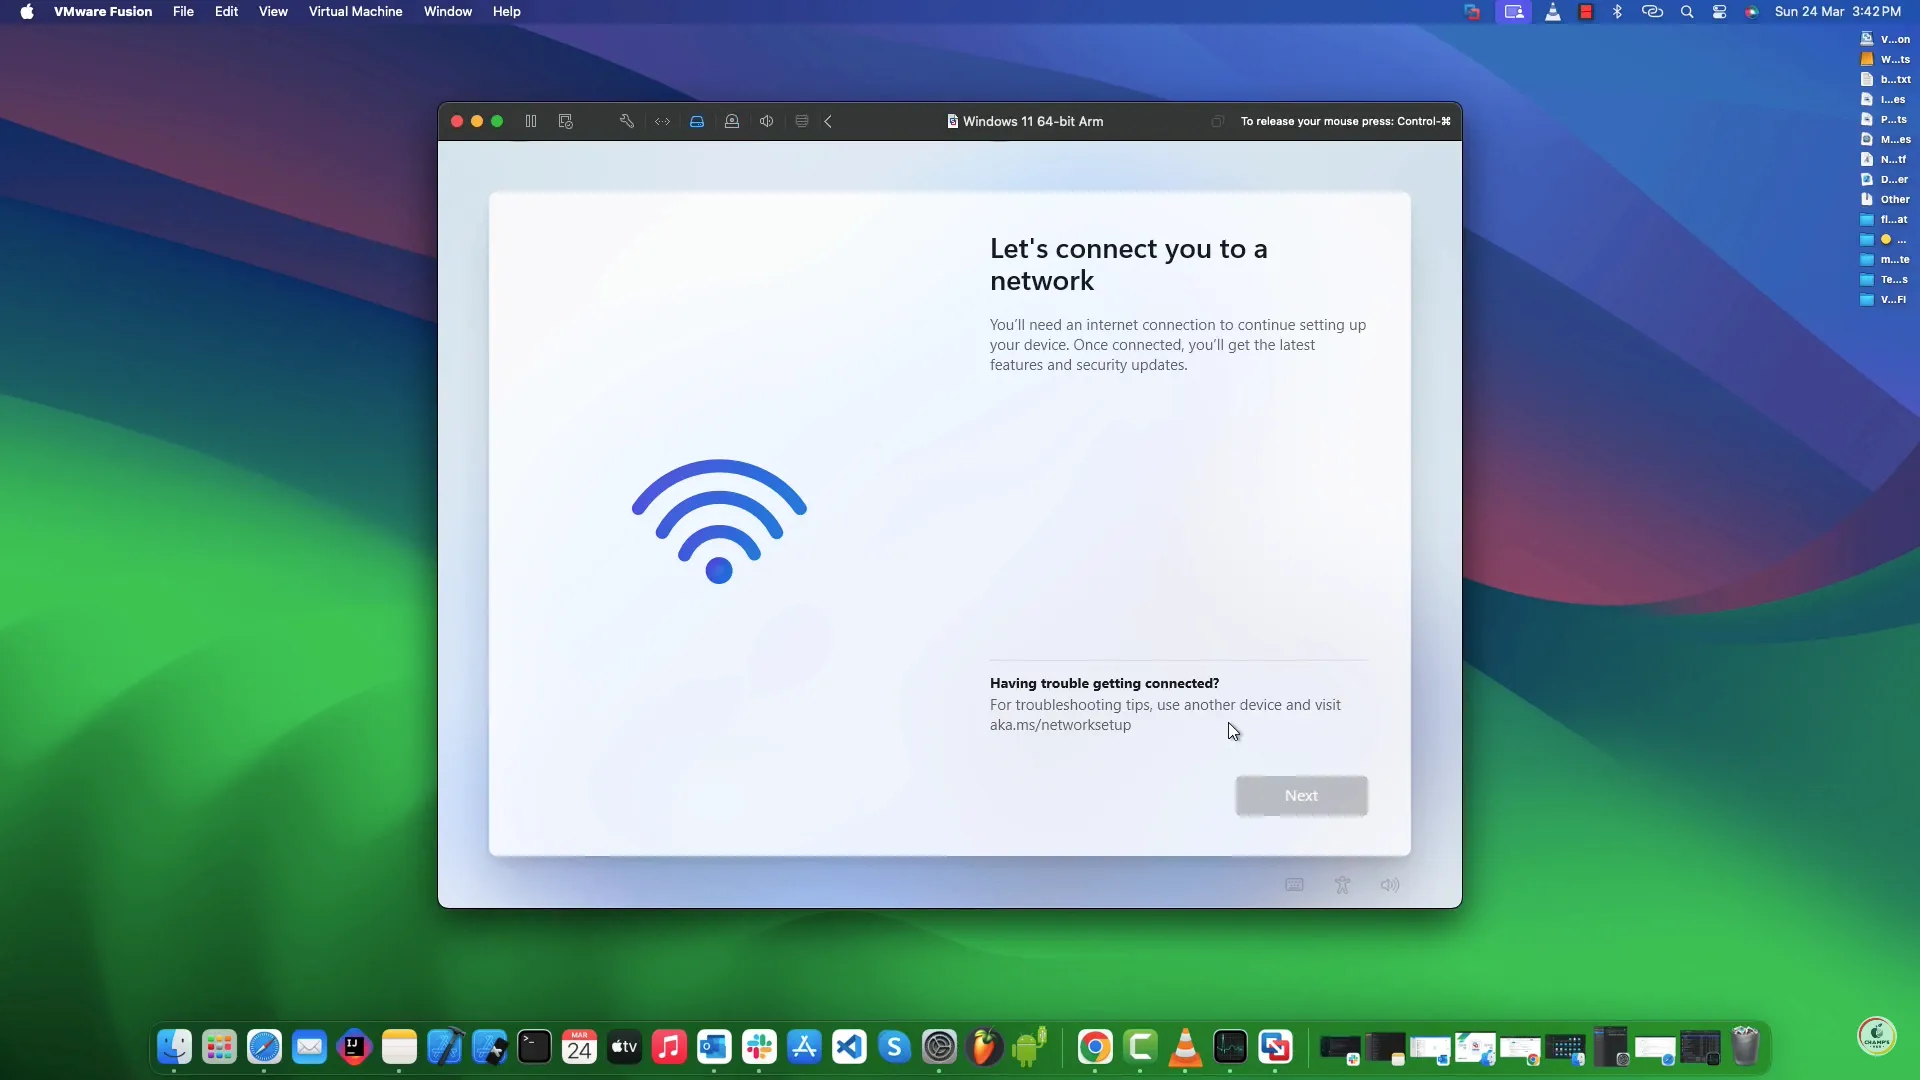
In order to solve this issue, we do need to install the network drivers using CMD prompt. While you’re on the above screen press keys combination — Shift + Fn + F10 to open the command prompt.
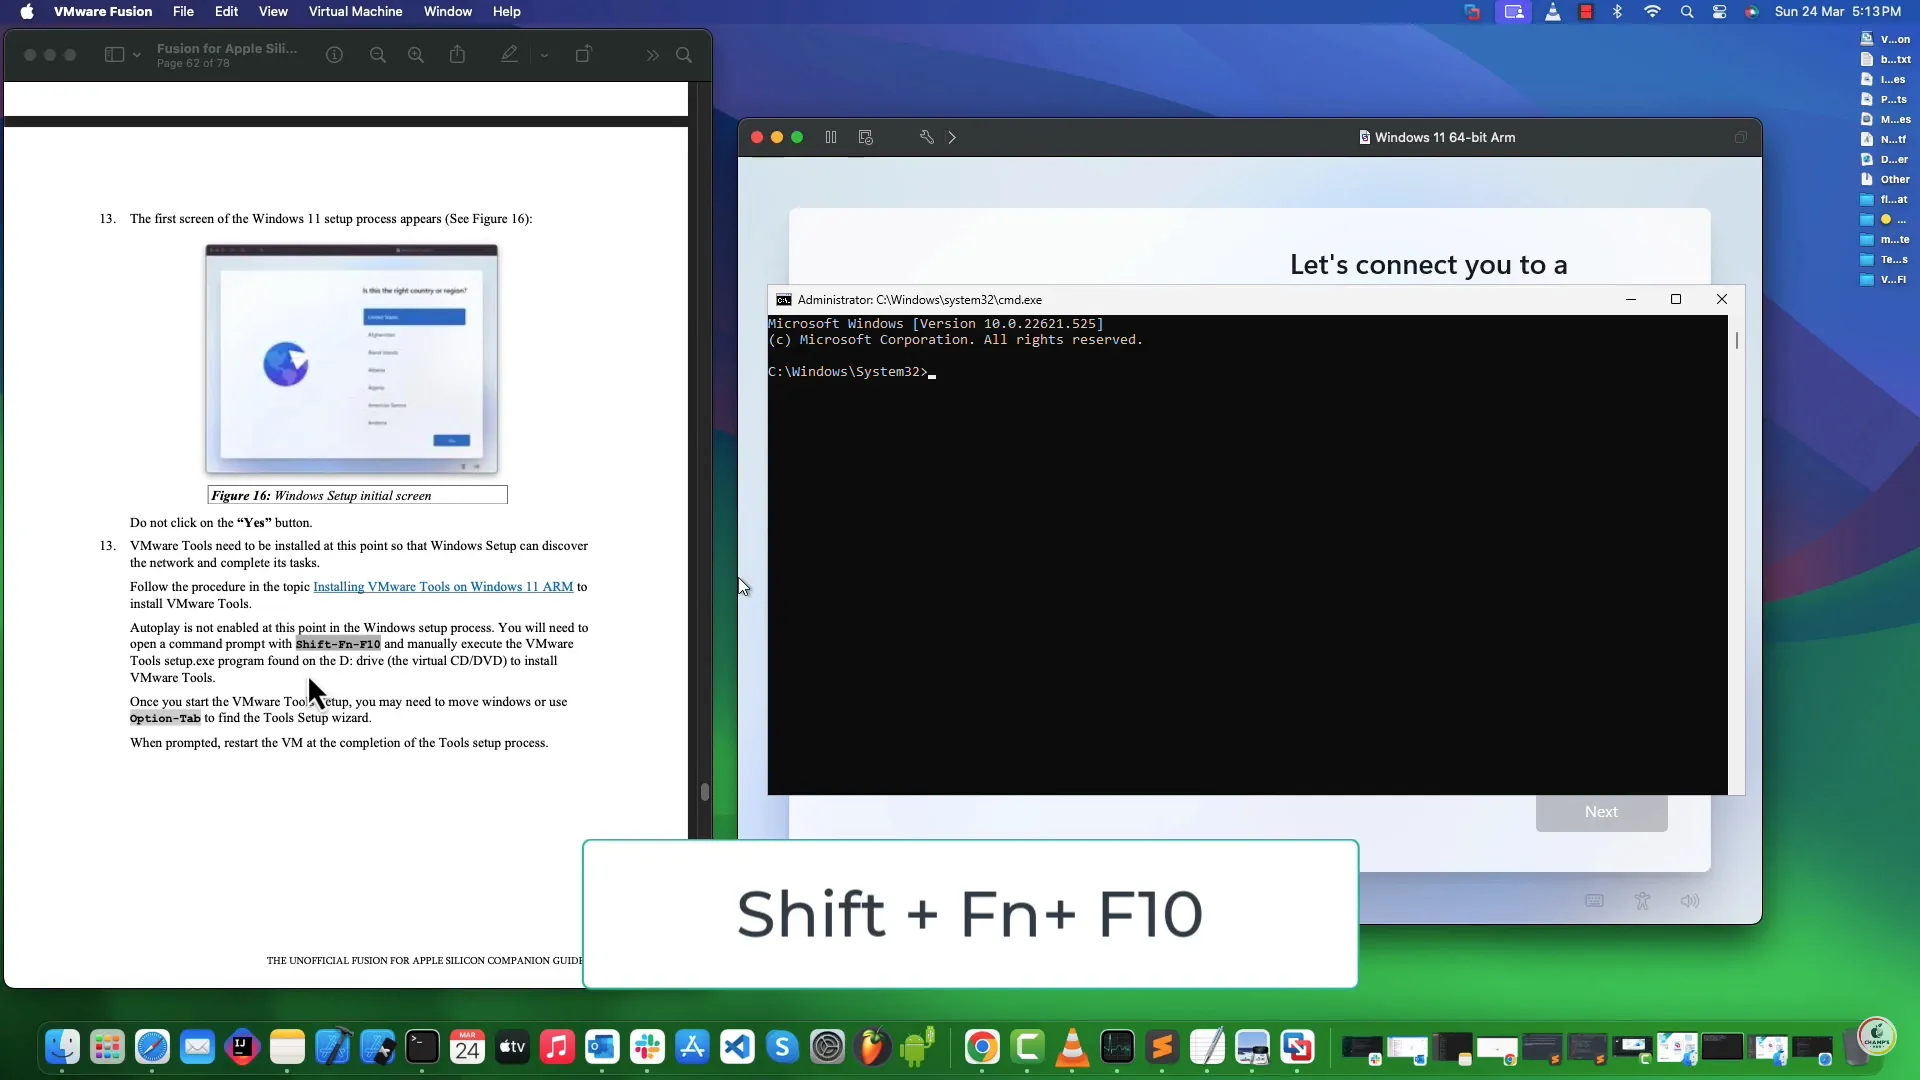
At this point, there is no autoplay enabled meaning you manually have to trigger the drivers setup.exe application to run and install the necessary network and other drivers. See the below attached screenshot.
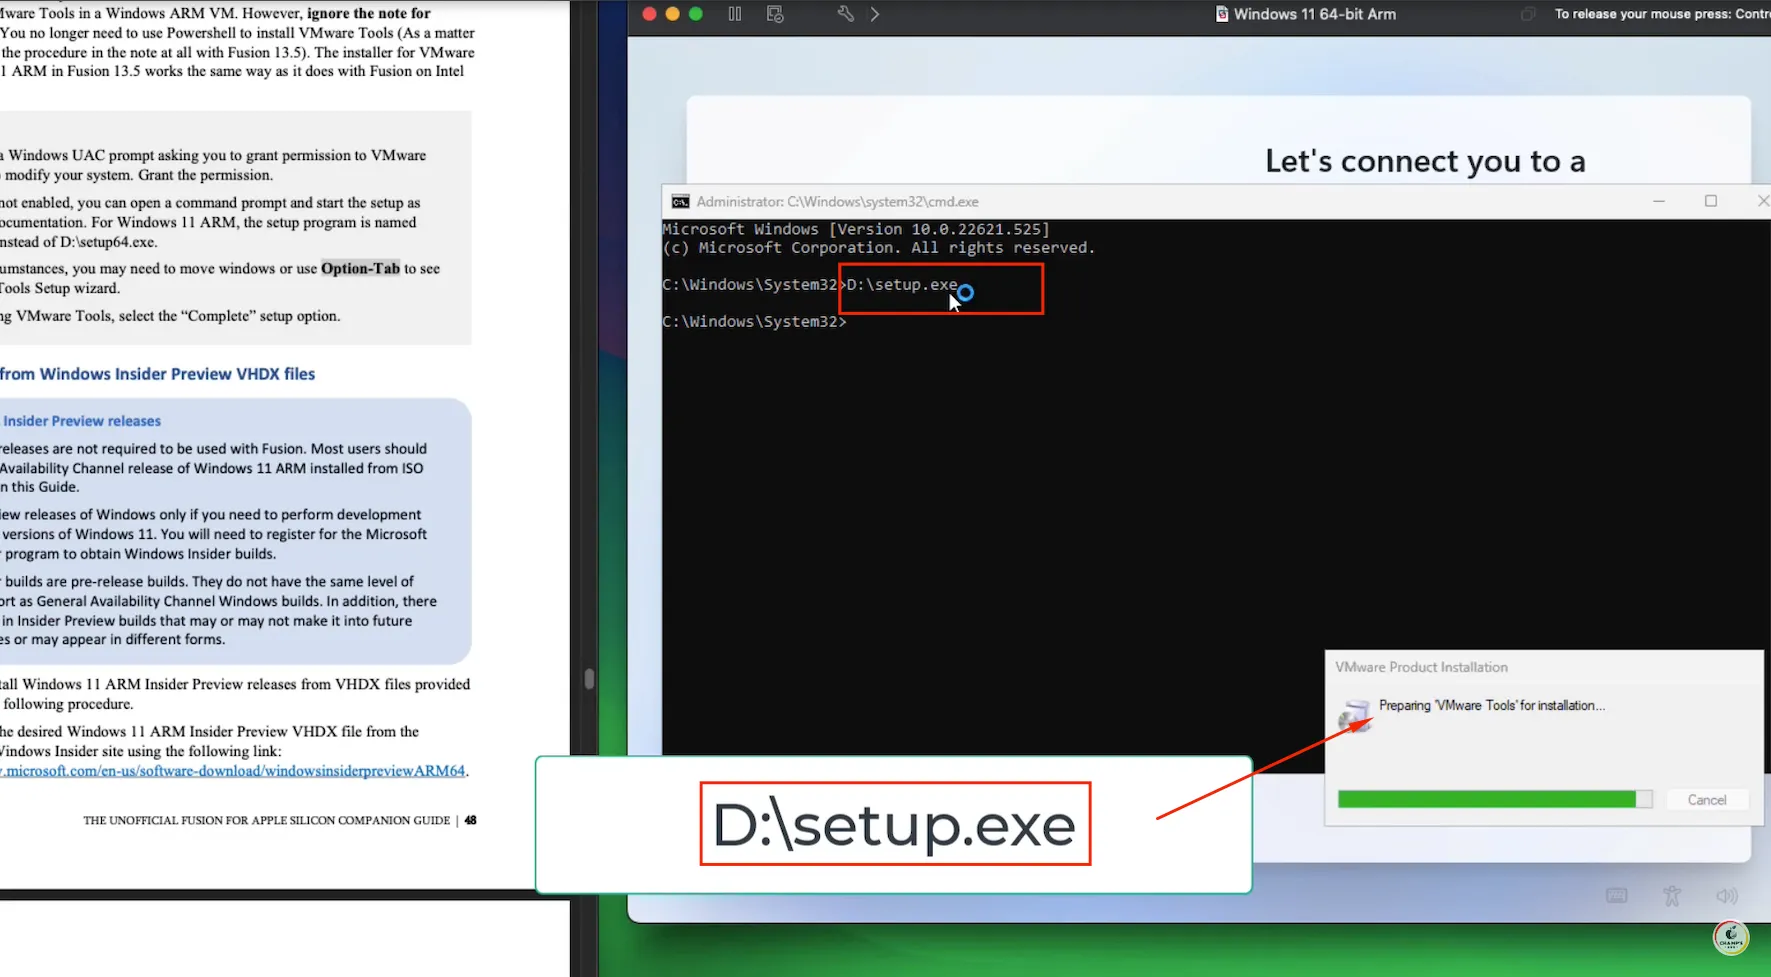
"Type D:\setup.exe in the CMD prompt and press Enter to install the drivers."
Once the drivers are installed, continue the Windows installation as usual. You will no longer encounter the internet connection issue, and you can proceed with the rest of the setup.
Thanks for your time! Much appreciated ❤